Audio Modding
Welcome to the beginning of your Audio Modding Adventure! Unlike the other modding sections, modifying audio in Helldivers does not require Blender or the Helldivers SDK.
Required Resources
Audio Modding Tool
Developed for modding Helldivers 2 audio and text.
WWise
Used by the Audio Modding Tool to convert audio files (.wav .mp3 .ogg etc) to .wem files. Helldivers 2 can only read .wem files.
WARNING
Wwise Version 2023.1.7.8574 is recommended.
Any other version may work, but are not fully supported.
Optional Resources
Audacity
Used for editing audio files.
Information Hubs
Community Music Archive
In depth documentation on what .wem files play in what situations.
Community Archive Labelling
Contains useful documentation for SFX and Voiceline modding.
Terminology
This is a file that acts like a folder for the game to organize it's files in.
This is the file we generate when making a mod for the game. This file goes into the Helldivers 2/data folder alongside the vanilla files.
This is a trigger for a segment to begin playing.
A segment is the house the Track and WEM live in. This contains settings that will tell the game "How much time to reserve so it's tracks don't get cut off."
A Track is what controls which WEMs play at what time. They also control the volume of the WEMs.
WEMs live inside the Tracks. They are the sound files the game uses to play audio. Much like an .mp3 or .wav file.
This is done by setting all four fields to 0 in the wem’s Track settings.
This is done by setting all three fields to 0 in the segment’s settings.
This will be something that occurs throughout the modding process, occasionally up to (but not limited to) 83 times per session. Just remember; crying is weakness leaving the body. Only the strong will prevail.
Modding Audio
Set-up
Download the Audio Kinetic Launcher
This is the launcher we will use to download Wwise
Download the newest release of the Audio Modding Tool
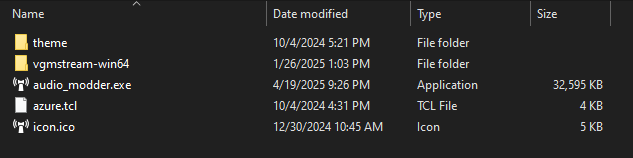
Unzip the files into their own folder with Winrar, 7zip, etc. Your folder should look like this:
Run audio_modder.exe
You may get a Windows protected your PC pop up, this is normal. The reason the program is flags as suspicious, is because it needs to search your Programs for your Wwise installation. Click More info then Run anyway. You will only get this prompt on the first launch.
Finding your Helldivers 2/data folder
On the first launch of the Audio Modding Tool it will ask for your Data folder. This can be found by:
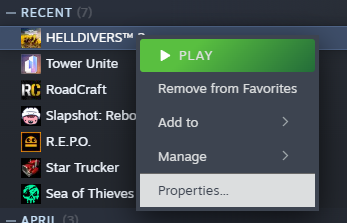
- Open your
Steam Libraryand right-clickHelldivers 2then left-clickProperties...
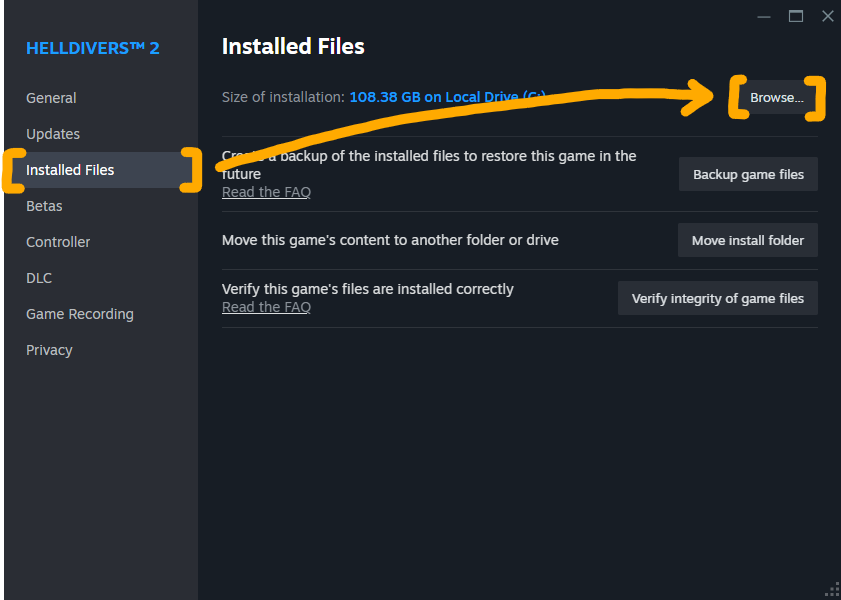
- Left-click
Installed Filesthen on the top right left-clikBrowse...
- Open the folder named
data
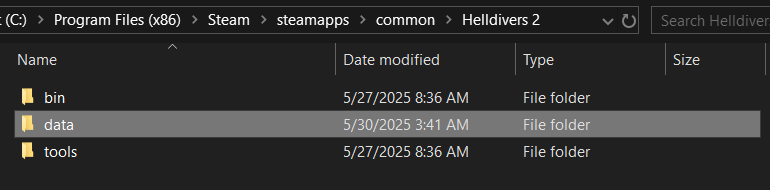
- Left-click on the empty right-side of the URL to select the path. Then press
Ctrl+Cto copy the path

- Paste the path in the Audio Modding Tool's pop-up explorer

Then left-click Select Folder on the bottom right of that window.
Audio Modding Tool
Now that we have everything set up it's time to get familiar with how the tool works.
The first step in every Audio Modding Project is to click View -> Hierarchy This switches the program from the "wem only"
 Sources View to a view that shows Segments, Tracks, Wems, and more.
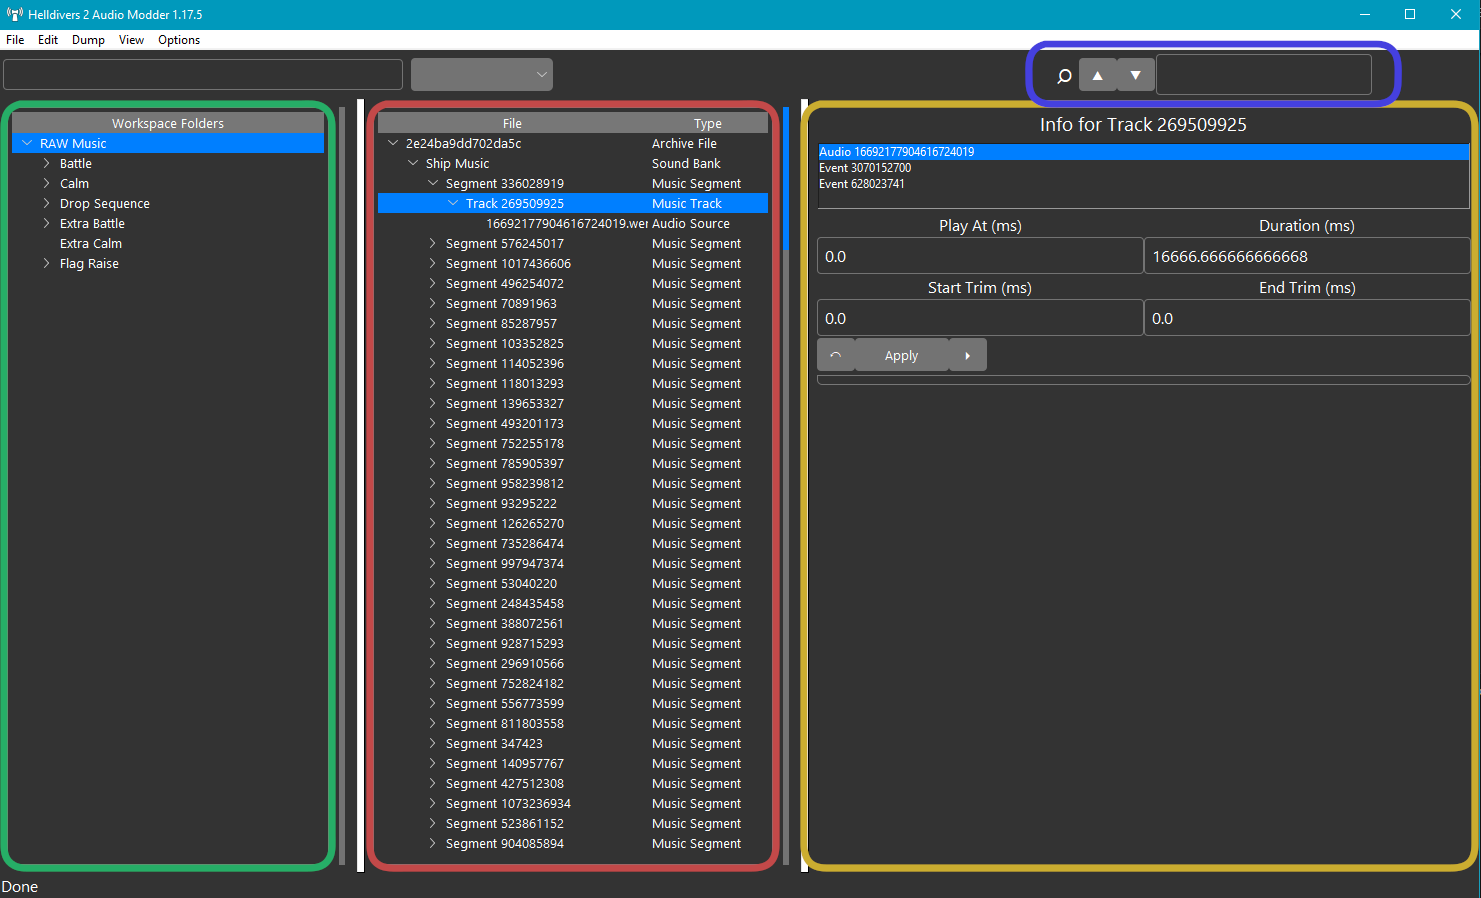
Tool Overview
Time to cover the basics.
- is for the folders you add through
File -> Add a Folder to Workshop. These will update live as you change the contents of the original folders. - is the section you will find the loaded
Archivesalong with theSegments,Tracks,Wems,Events, etc.
Archives are loaded via File -> Open -> From HD2 Data Folder
- is where we change the settings for the selected Segment / Track. Left-click on files in The to pull up their Info in .
- is the search bar. Paste a wem filename and press `ENTER` to search. This will sort through currently loaded Archives in the . There can be multiple results, see to the right side of the Search Box for this information.
1. Importing Files
There are several methods to importing audio files to our patch.
2. Workshop Method
First, Import a folder to the Audio Modding Tool. by left-clicking File -> Add a folder to Workshop