Armor Replacement
Setup
Upon launcher Blender and having the SDK installed, you will need to do some basic setup.
Load the base game archive by clicking the star icon
Hit New Patch
This will need to be done everytime you open Blender up again.
Import Unit to Replace
Use the Search Found Archives section to search for the archive of the item you wish to mod to add it to the currently loaded archives. If the item cannot be found, use the spreadsheet.
Helmets and Armors are in two separate archives so you will need to load both of them.
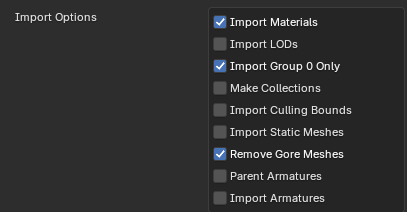
With the archive selected in the SDK, import all the units into Blender. These are ArcanePoro's recommended settings for armor imports, but if you wish to retain the gore mesh you can keep that ticked off.
Posing
Import the model you are going to use to replace the base game armor set. You will now being posing your model to HD2 A-Pose.
WARNING
The model you are using should already have a rig, if it does not, you cannot do this step until you have rigged. This can be done by either rigging said model yourself or by obtaining a model that is already rigged.
Cutting
At this point it is recommended to duplicate your model so you do not cause any destructive actions that you cannot revert from. This can be done by simply selecting all objects associated with your model and pressing SHIFT+D.
Your model does not need to be cut in the same exact way as the Helldiver model. You cut your model based on the weights.
For example, for the legs you would cut where the thigh weight is 1.0 because the thigh bone is shared between the Helldiver leg part and the Helldiver waist part.
In the end, the 6 main parts at minimum that you should have are:
Left Arm
Right Arm
Torso
Waist
Left Leg
Right Leg
Any other parts are extra and should only be considered if you are modding an armor set that has shared body parts.
Fixing Cut Seams
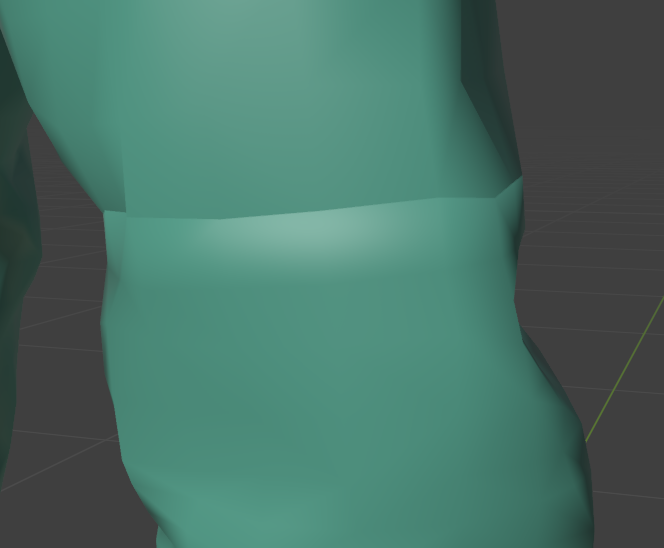
After cutting you may notice that your model now has visible seams.
This is usually caused by doing a mesh separation ALT+P without first doing a Mesh > Split by Selection operation. You can fix this by doing the steps mentioned before, or by doing a data transfer modifier.
Since the mesh you are currently cutting is a duplicate of your original mesh, you can use the data transfer modifier to reapply mesh normals to your cut body parts.
Apply Data Transfer modifier to cut body part
Select original mesh for Source
Check Face Corner Data
Select Custom Normals
Apply
Repeat for all cut body parts that are suffering from visible seams
There may be some errors on the mesh after this operation, so you may need to separate your mesh into specifically the affected areas where the seam appears only before doing the operation.
Weight Paint
To have your model move in-game, the model will need to have the proper vertex groups applied to the mesh. There are two methods that can be used here.
Blender's native transfer weights function or use the Robust Weight Transfer Plugin, a better alternative to the native function.
Renaming and mixing vertex groups to from the rig your model comes from to fit the Helldivers 2 rig.
WARNING
It is highly recommended to not use the shoulder bone of the Helldiver 2 rig. The way it is implemented poorly and will result in tangled arms when using emotes. It is much better to put any upper arm weights onto the shoulder_twist bone. Visit anatomy to see why.
INFO
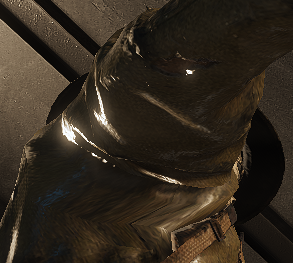
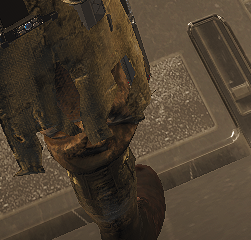
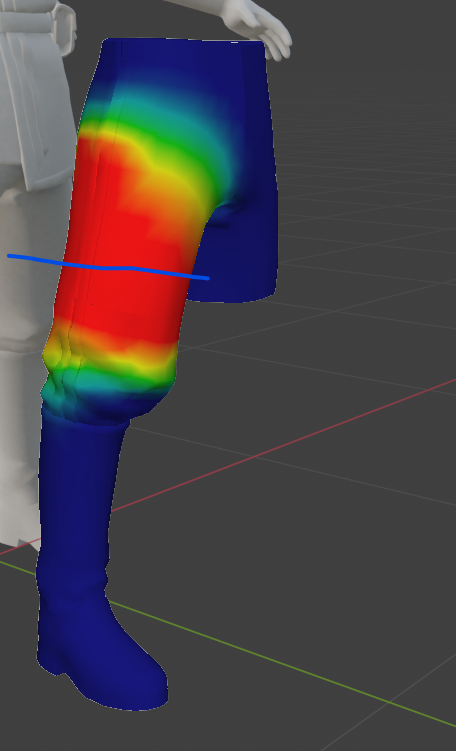
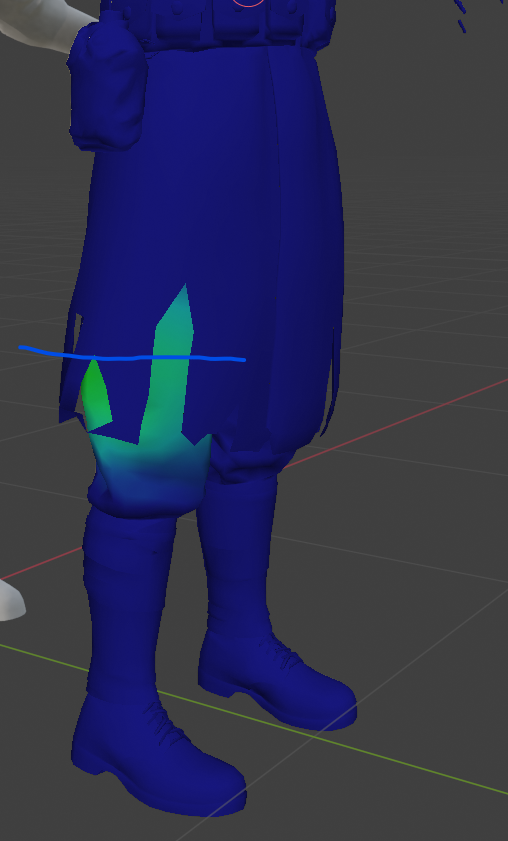
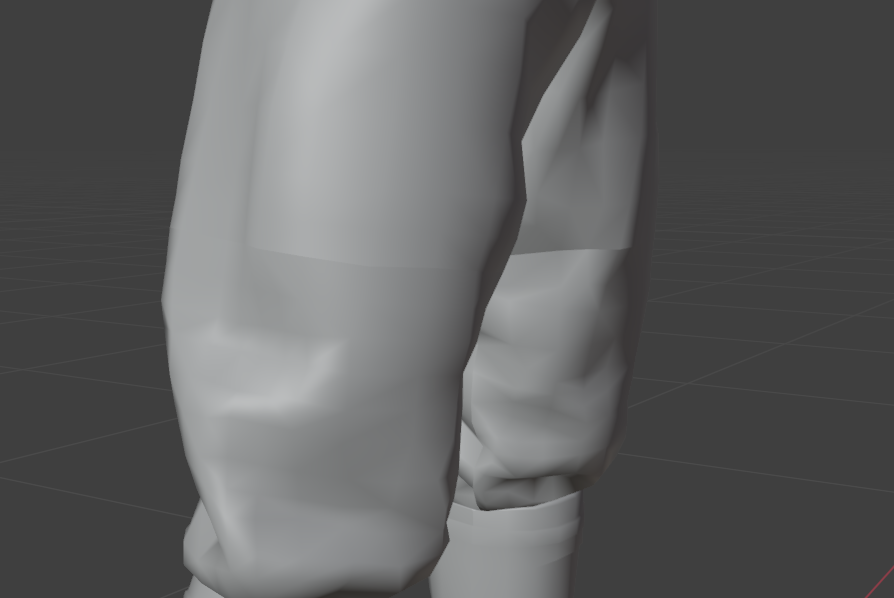
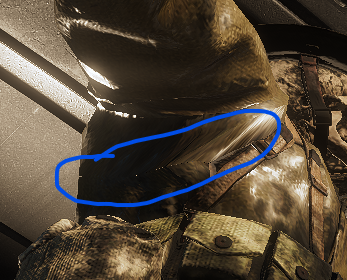
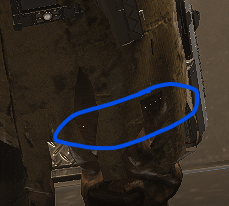
Remember to make sure that all your body parts are 1.0 at the seams for the shared bone. It should look like the first picture and not the second picture. Edges for shared bones should only be weighted to a single bone!
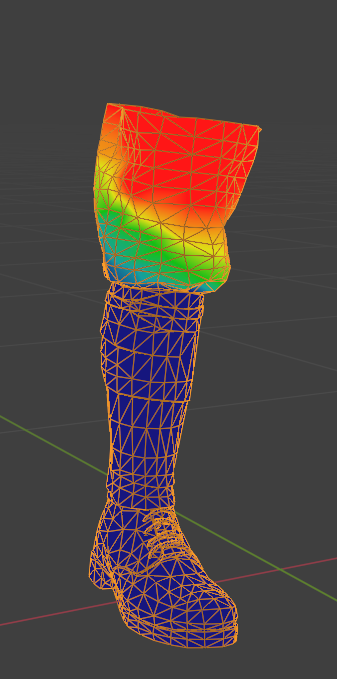

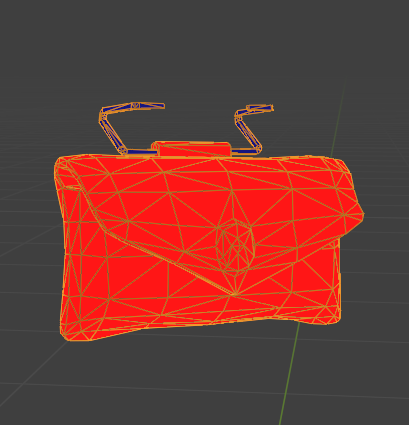
Know the difference between a soft body weight and a hard body weight.
Soft Body weights are things that naturally stretch and bend, like cloth or skin. These will usually have a gradient type of weight paint.
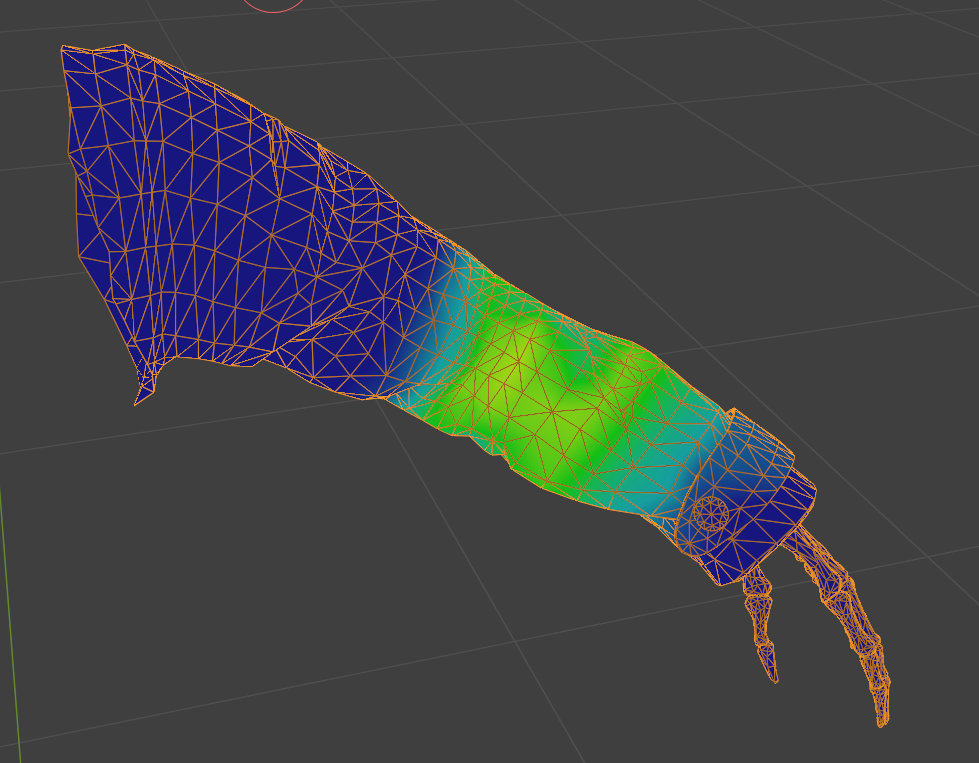
Hard Body weights are things like metal or bags on the model that are attached at specific points. These will have a single 1.0 weight paint.
Materials/Textures
Use the SDK to generate materials for your mesh to utilize. Please refer to this section on the types of material shaders are available to use.
In the material foldout section hit the + button
Choose material template you want to use
In your mesh, go the the material tab and replace the material with the SDK material
Input the textures required for the material shader
Repeat for all materials to be replaced
Copy Properties
For each body part you replace, you need to copy the properties of the unit in order for it to be replaced in-game.
INFO
If you intend to only replace a single body type, make sure to separate the base game asset body parts into their specified body type before proceeding with this step. Visit the anatomy section if you are confused on what this means
Copy Properties through SDK
In this method you will copy the properties of the base game unit through the usage of the SDK's copy properties function.
Select Base Game body part
Right click and select Copy HD2 Properties
Select your model body part
Right click and select Paste HD2 Properties
Repeat for all body parts you are replacing
You will also need to copy the point of origin for the body part as each body part may have a different point of origin than 0,0.
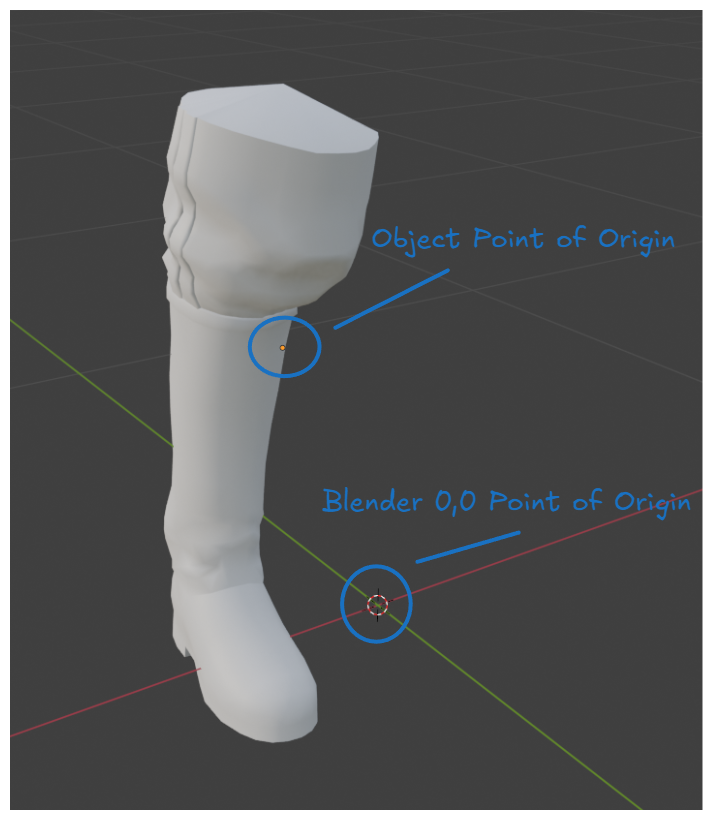
Select Base Game body part
SHIFT + S > Cursor to Select
Select your model body part
Right click and select Set Origin > Origin to 3D Cursor
Repeat for all body parts you are replacing
Copy Properties throguh Merging
In this method you will copy the properties of the base game unit through merging your mesh to the base game mesh.
WARNING
If you use this option, make sure to rename your UVMap to UVMap instead of whatever your mesh has before joining the objects together. This can sometimes be something like Diffuse UV.

Select Base Game body part
Go to edit mode and delete all vertices
Remove all materials
Select your model body part
CTRL+Select the base game object
CTRL+J to join
Whatever option you choose, do this for all the units you are replacing.
Making Unused Assets Invisible
You may find that you do not need all the body parts of an armor set. In order to not make these parts show up on top of your modded model, you will need to make them invisible.
Select Base Game body part
Go to edit mode
Select all with A
Press M > Merge at Center
The SDK cannot save a unit to have 0 vertices, so you need to save at least 1 vertex. Games cannot render mesh faces with less than 3 vertices so by reducing the total vertices to 0, you have effectively made the mesh invisible.
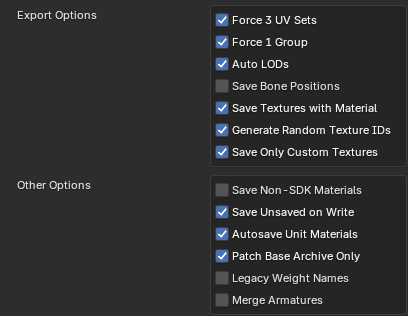
Creating Patch
The model is now ready for in-game testing. For first-time modders, it is recommended to have these setting enabled when saving the units you are replacing.
Hit New Patch to have a fresh patch
In your Blend scene, have all body parts you are replacing, including the invisible body parts
Select all body parts with A
Right Click > Save Units
Wait for SDK to process
Write Patch
Test In-Game
Continue tweaking your model until it feels good to you.
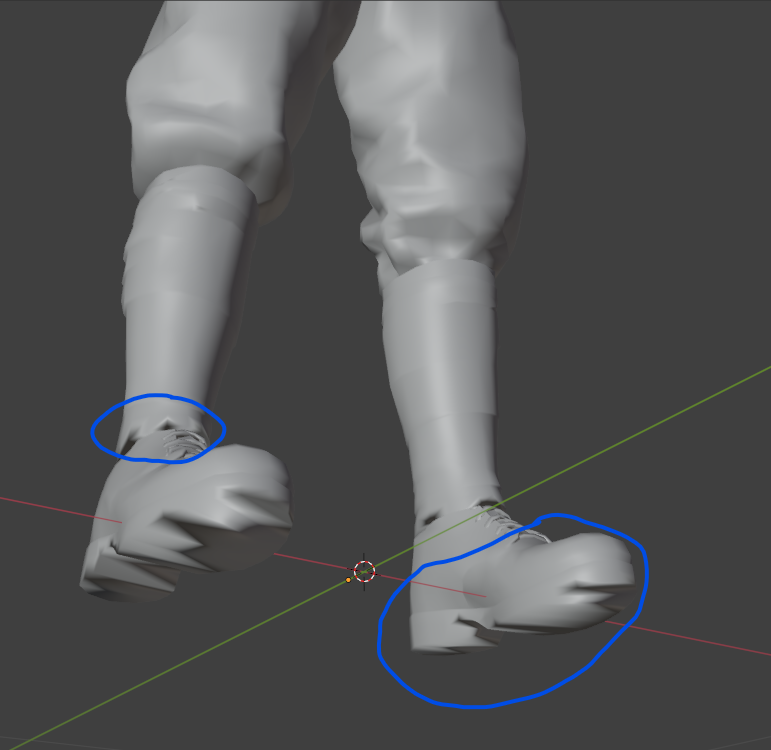
Fixing Micro-Seams
Sometimes even when your model is properly weighted, micro seams will appear at your cuts.
To fix this you simply just need to extrude your model slightly at the cuts.
Select mesh
Open edit mode and select vertices on the edge of cut
Press E to extrude
Move extrusion into other body part
Scale down to hide extrusion inside
This will cause your model's mesh normals to get messed up so you will have to use a data transfer modifier to fix it. Go to the Fixing Cut Seams section.
Now the 1-pixel seams are gone