Cape Modding: Beginner's Course
Welcome to the beginning of your Cape Modding Adventure.
This guide is aimed at those who have never made a mod before and would like to get started.
If you feel this guide holds your hand too much please check out our Intermediate Guide
Tools Needed
If you haven't already, download the following files.
Blender 4.0
The way we'll be using Blender is more akin to a menu. You won't need any prior Blender Experience to complete this course.
WARNING
Blender Version 4.0 is absolutely required.
Any version from 4.0 to 4.3 will suffice but versions beyond WILL NOT WORK.
Helldivers 2 SDK
Essential Software that we'll plug into Blender that will allow us to make our mod. Don't unzip this.
GIMP
This is a free image editor that we'll be using to make adjustments to our files.
WARNING
I'll be using GIMP 2.10 in this course.
But any version of GIMP 2 will work the same. The only difference will be the appearance and layout of the application.
Section 1: Setup
In this section we'll get our battlestation fully operational.
Adding the SDK
After you have downloaded and install all three programs open Blender 4.0.
Once Blender is open, left-click Edit -> Preferences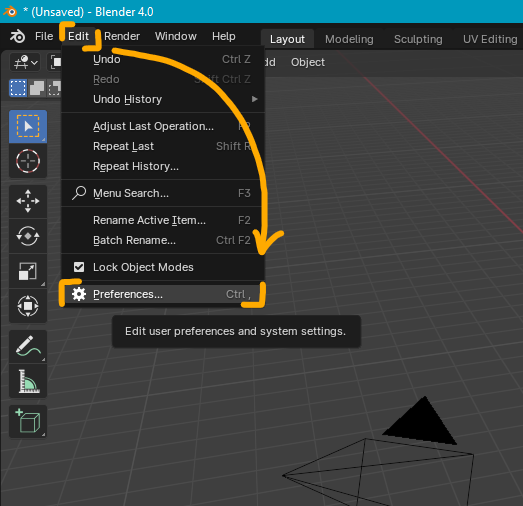
Make sure the Add-ons section is highlighted blue on the left-side navigation bar. If it is not, left-click on it.
Afterwards left-click on Install... in the top-right of the window. 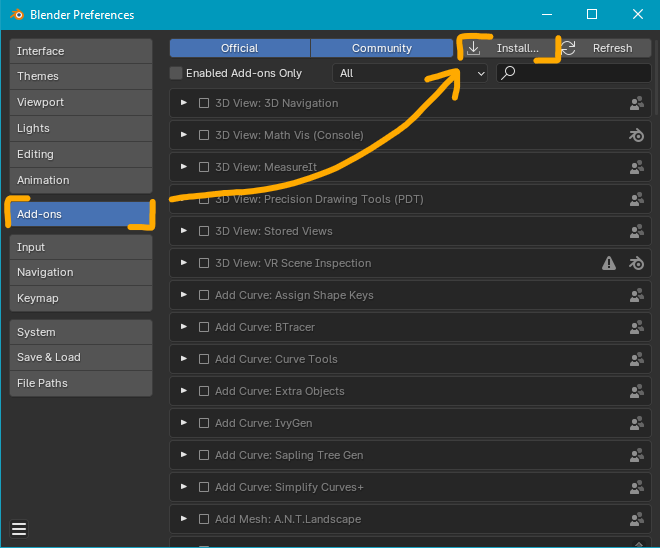
Next we'll select our zipped SDK file by left-clicking once. Then left-click the blue button on the bottom right of the file view window labelled Install Add-on. 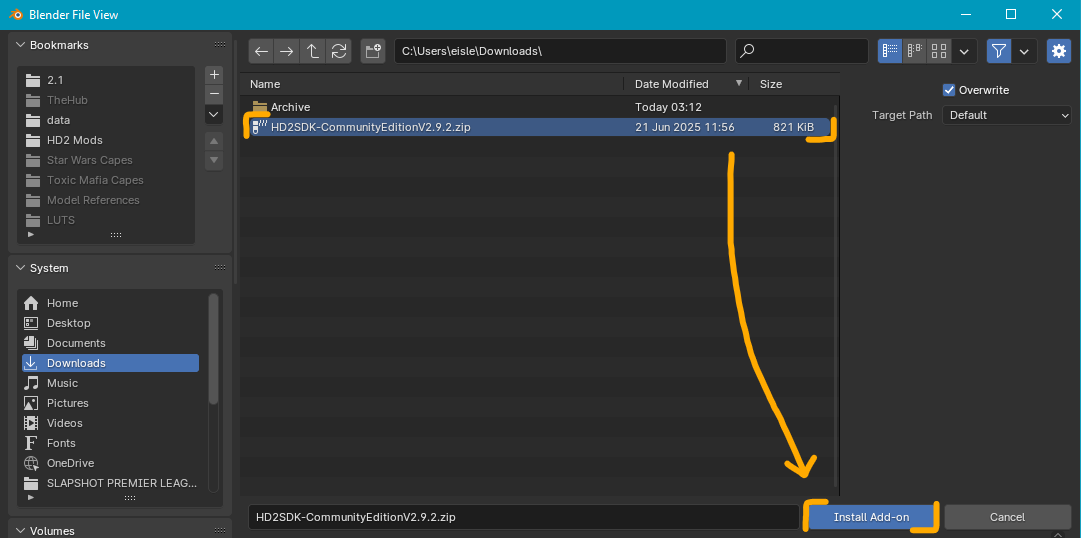
Then we'll enable the SDK Add-on by:
- Using the search bar on the top right to enter the term
Helldiver. - Left-click the box next to
Import-Export: Helldivers 2 SDK: Community Editionso it shows a checked box.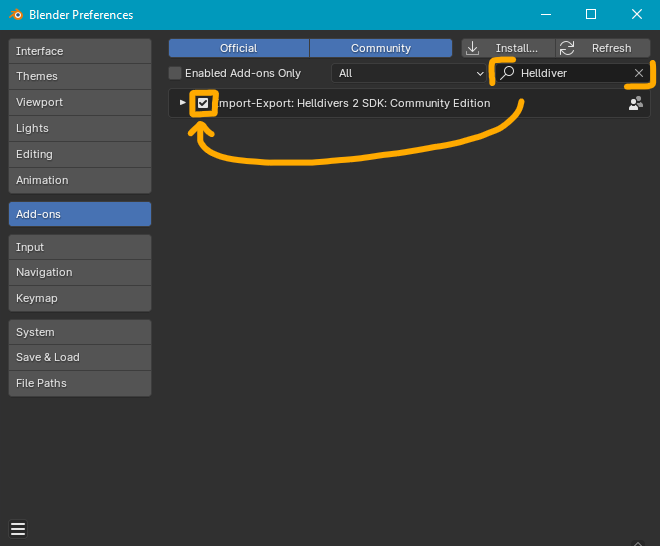
Leave this window open for the next segment.
GIMP File Path
To start off we'll need to find out GIMP-x.x.exe file.
To do this press the Windows Button and type GIMP. The top result should be GIMP followed by the version number you installed. Right-click that application and left-click Open File Location. 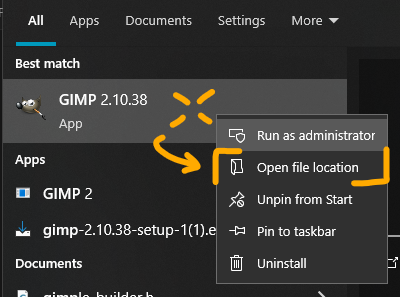
This should bring you to your Start Menu/Programs shortcuts. Right-click GIMP again and left-click Open File Location once more. 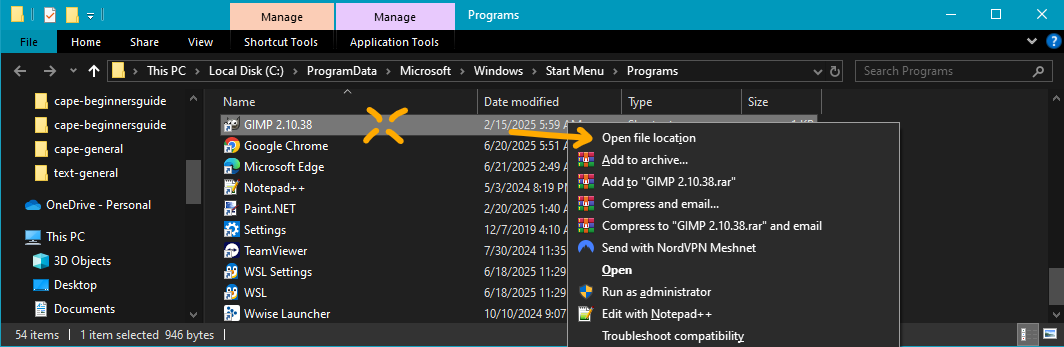
Now we should be in the Program Files/GIMP 2/bin folder. We'll copy the path to this folder by Left-clicking anywhere to the right of all the URL text. 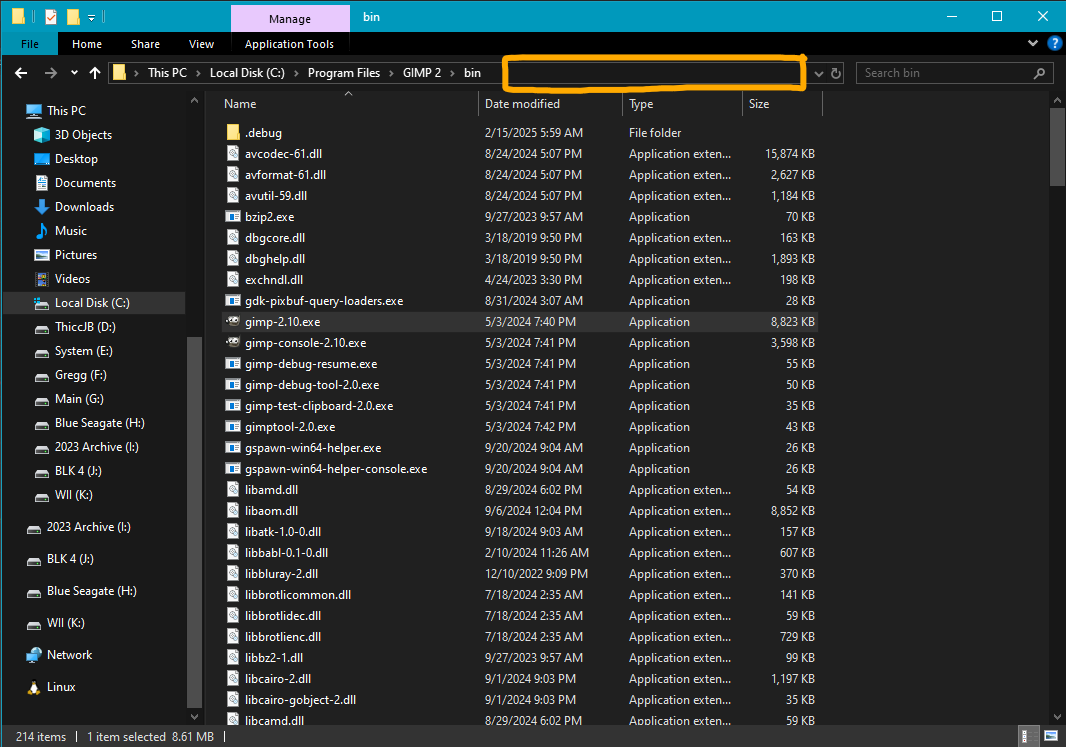
This will highlight the URL blue, press Ctrl+C to copy this text.
Back in Blender: If you accidentally closed the Preferences window; left-click Edit -> Preferences
Next we'll select File Paths in the left navigation bar. Then click the drop-down arrow next to Applications. 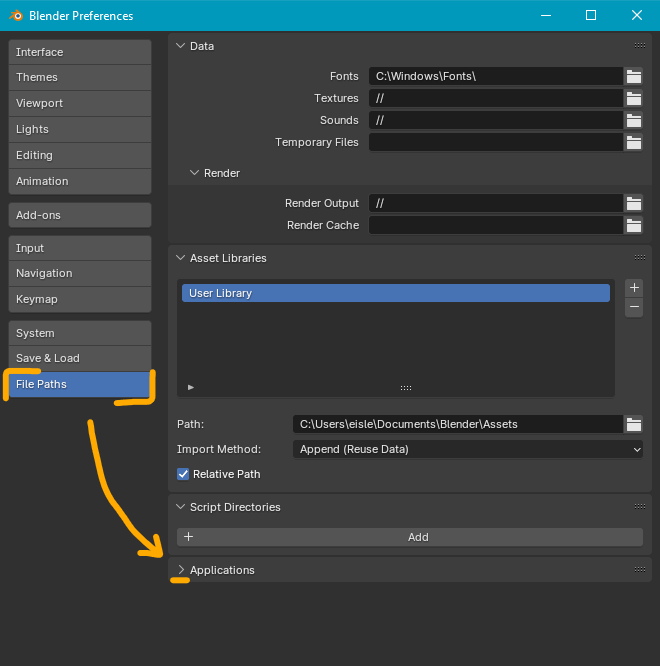
Then left-click the folder icon to the right of the Image Editor field. 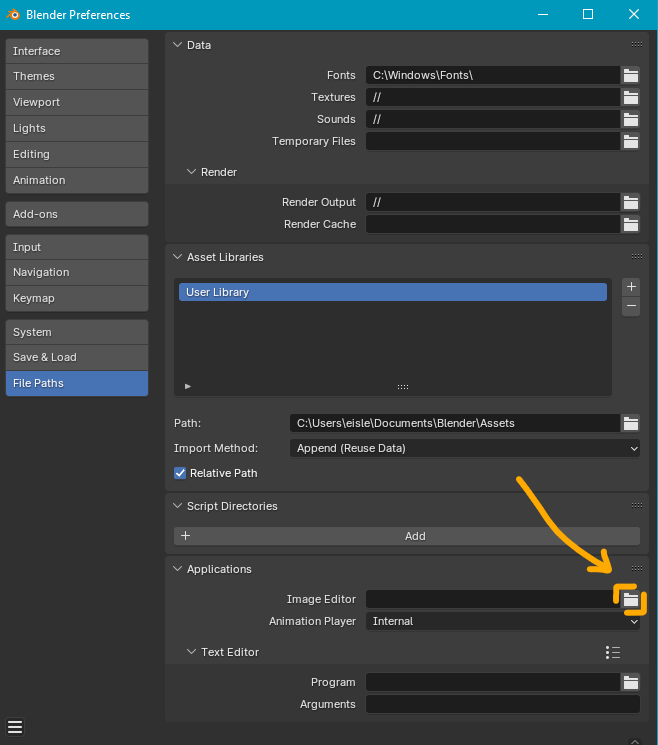
Now we'll paste our GIMP 2/bin path we copied earlier.
With our new window we just opened in Blender, left-click on the URL bar and after it's highlighted blue press Ctrl+V to paste the path then press ENTER.
After that we need to find the gimp-x.x.exe file. In my case, I have GIMP 2.10 so the filename is gimp-2.10.exe.
Once you find it, left-click it once.
After that click the blue Accept button on the bottom right of the window. 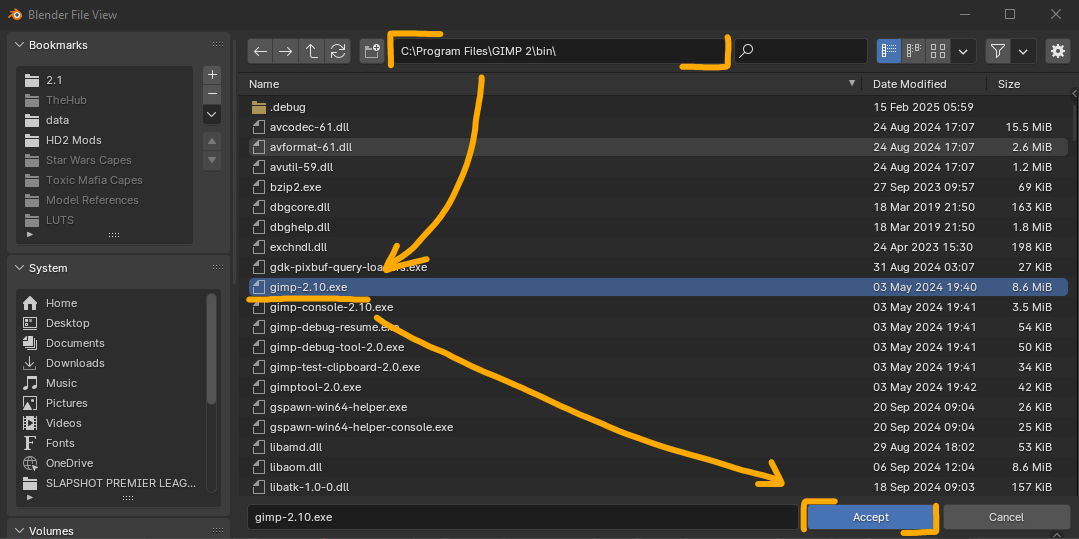
Our last step in this course is to close Blender.
We have now completed our Setup Section. Well done soldier.
Section 2: Modding Basics
In this section we will go over the essentials to modding capes.