Separating Patches
Separating Patch files, when done correctly, reduces total file size and to make re-patching easier if future game patches breaks mesh mods.
Having your textures and meshes written into separate patch files helps cut down on duplication of assets. If you use the same texture set on 10 different patches, instead of including the textures 10 times, you can just include it in a separate set of patch files once. This can significantly reduce the file size of your mod.
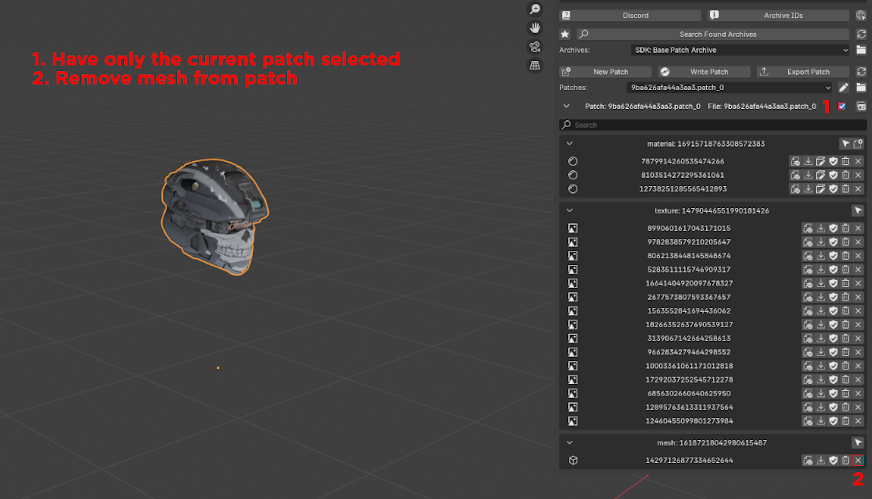
When saving a mesh, the SDK will have saved your textures, materials, and mesh. Have the current patch selected and remove your saved mesh. This will be your textures patch.
Move your textures patch files to an appropriately named folder. Having the name of the asset and then the word "Textures" at the end will suffice.
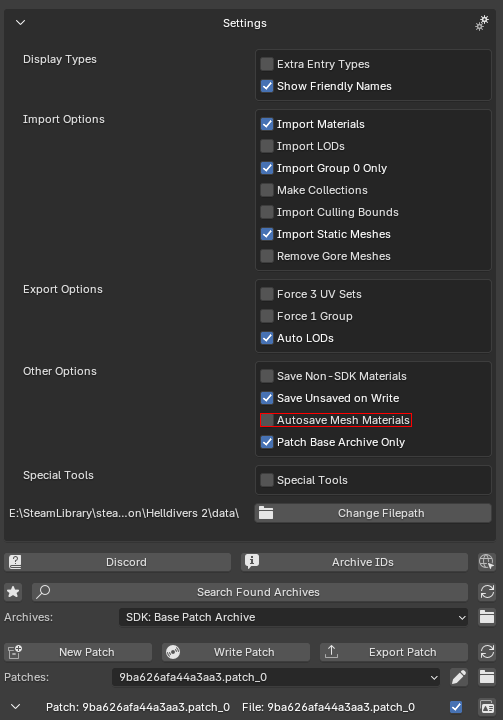
Create a new patch and save only your mesh now. This can be done in the settings menu by turning Autosave Mesh Materials off.
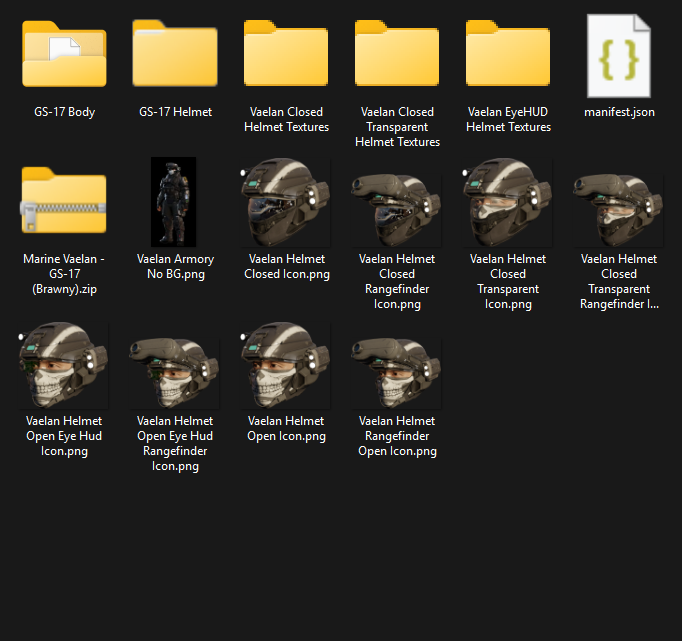
Move your mesh patch files to an appropriately named folder. Once done for all of your assets in your mod, your mod folder should look something like this:
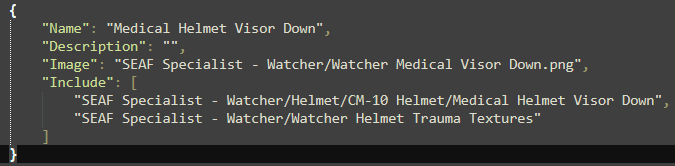
Adjust your manifest to load both your texture and mesh patches at the same time.
If you only have a single option for your mod, you just add an extra line to your Include section like so.
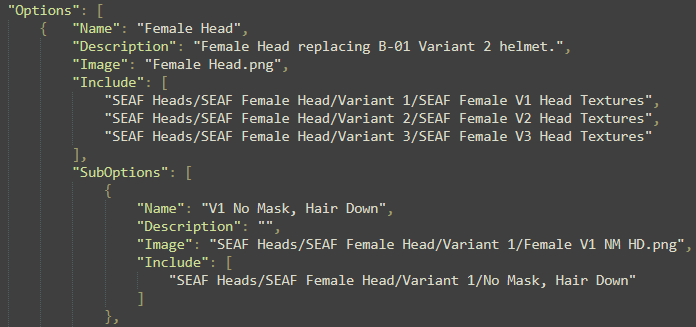
For mods that have SubOptions, you can make your manifest like this.
Now your patch files are separated!
If a future update causes mesh mods to break, this also simplifies the re-patching process as you now only need to re-patch your mesh patches instead of having to re-patch both textures and meshes.
This means that if you use something like the Advanced or Translucent material shaders you do not need to remember your specific settings for the shader variables each time.