Armor Swapping
An updated method for swapping custom and base game models from one armor to another, unlike ID swapping, avatar swapping can be repatched.
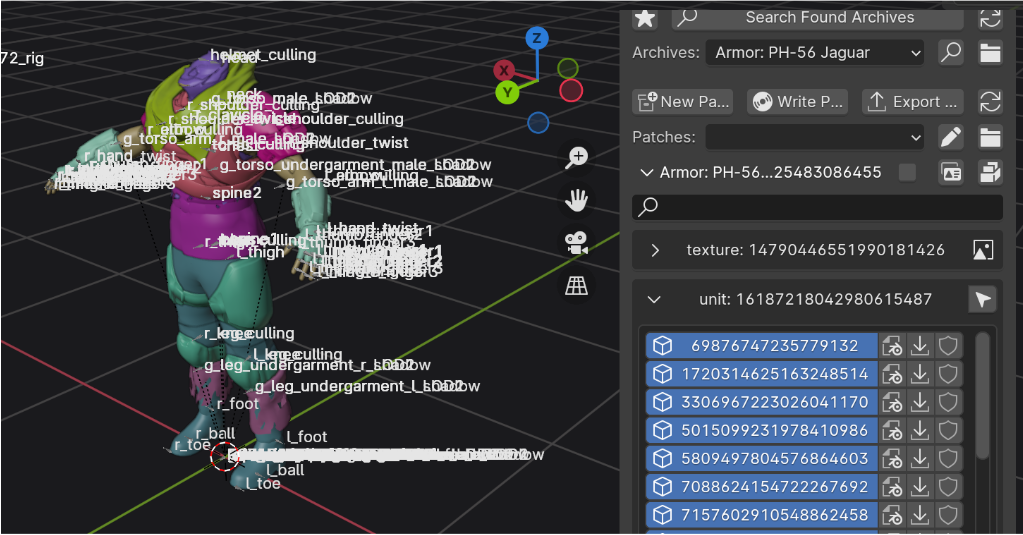
Import Helldiver Rig
The Player Avatar Rig is in the Super Destroyer Interior 2 archive, the units ID is 5556372446766824087
![]()
Import Armors To Transfer
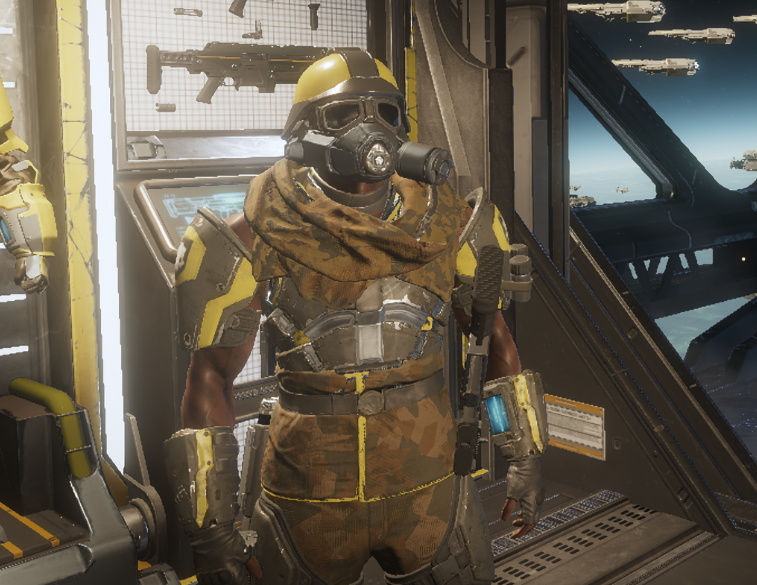
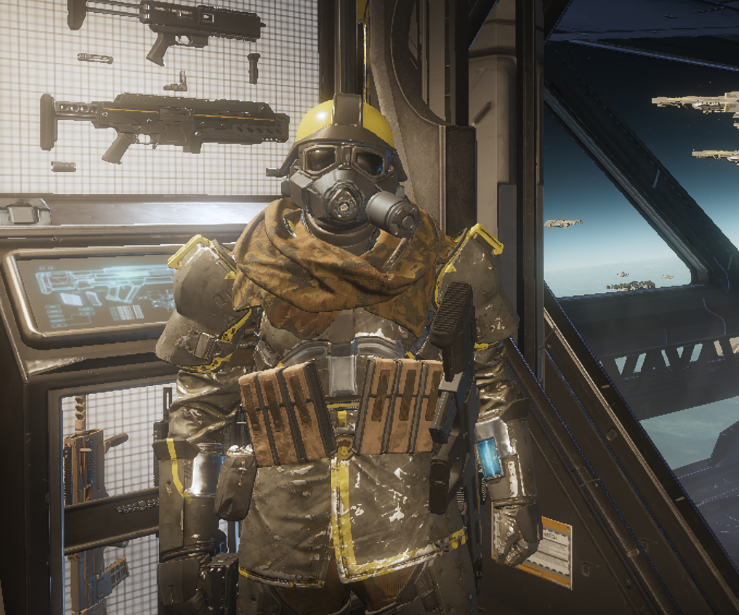
Import the meshes for the two armors you want to swap. We'll call them Armor A and Armor B for this tutorial. A will be the AF-91 Field Chemist, and B will be the PH-56 Jaguar, we will be putting A onto B.

Setting Up The Rig
Delete any lights and meshes attached to the Avatar rig, these are unnecessary to swapping, we just need the armature itself.
![]()
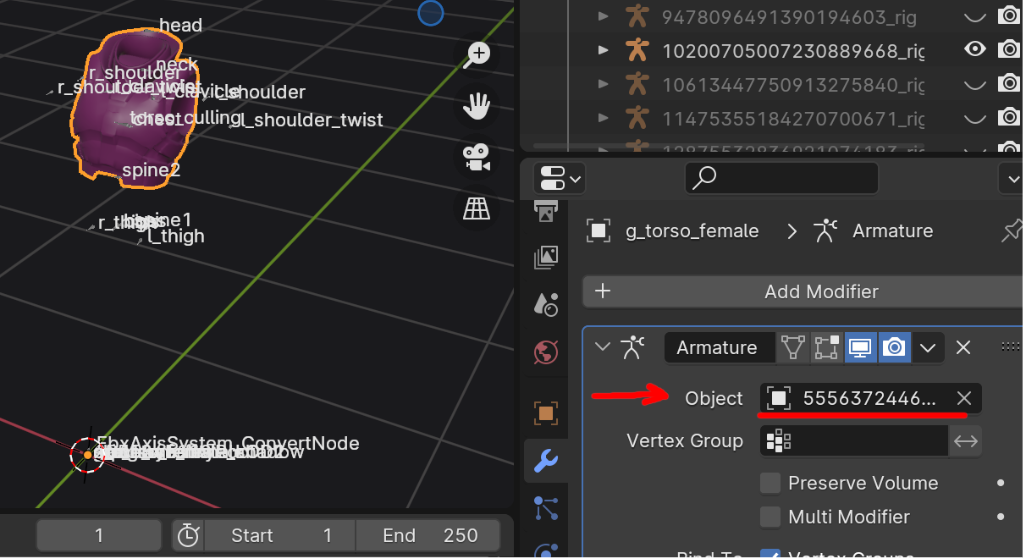
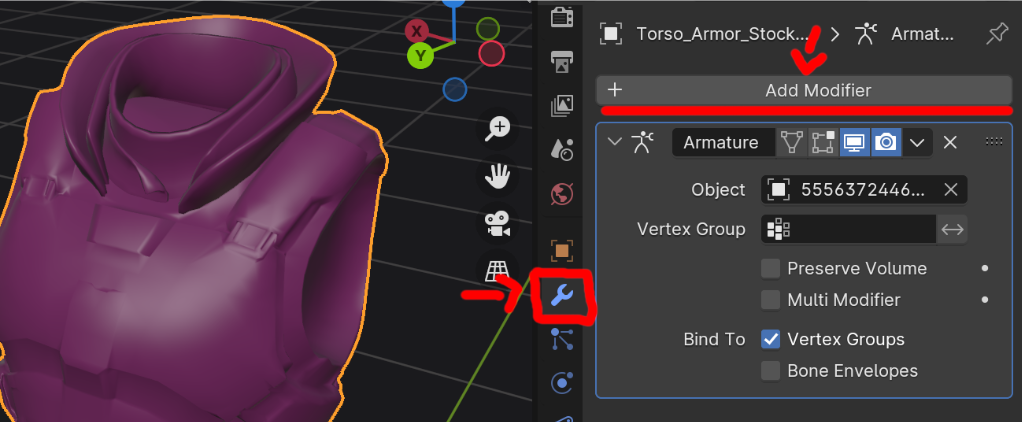
Changing The Armature modifier
With the rig clear, we are going to take the Armor B meshes, and go to the modifier tab, where there will be an armature modifier.
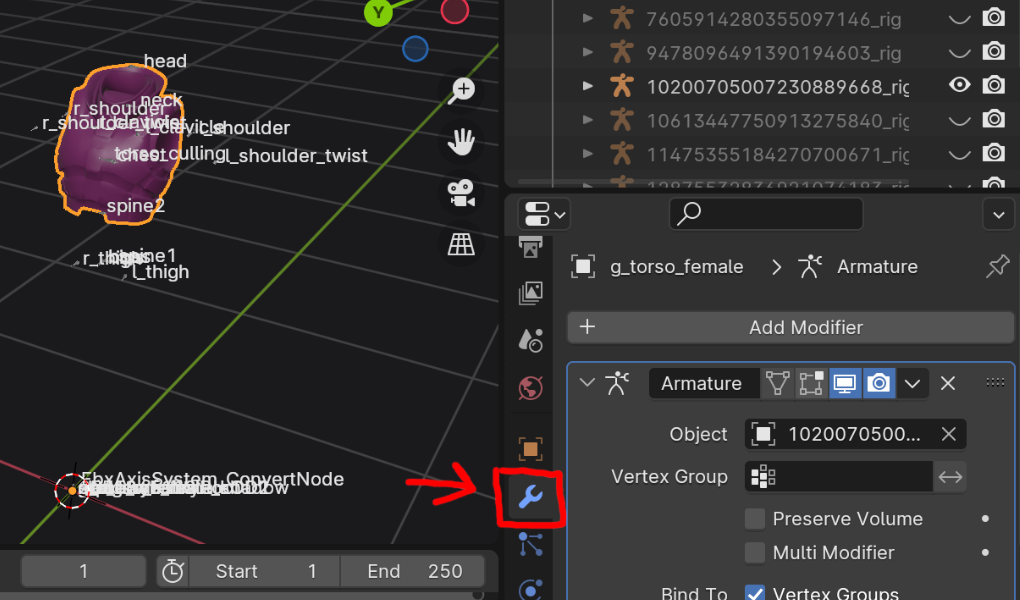
We are going to change the Object to our Player Avatar rig. The rig itself uses the same ID, so look for 5556372446766824087
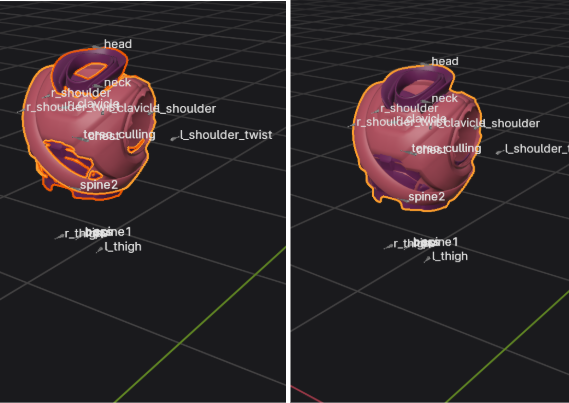
Copying Properties
Now that we have the Player Avatar rig set onto Armor B, it has all the bones it would need for any armor in the game.
All we need to do is give the properties and origin point of Armor B, to Armor A. To do this, we are going to join (ctrl+J) them, and then delete the Armor B meshes and materials
In the materials tab, we can choose the materials for Armor B, and hit select, highlighting only Armor B
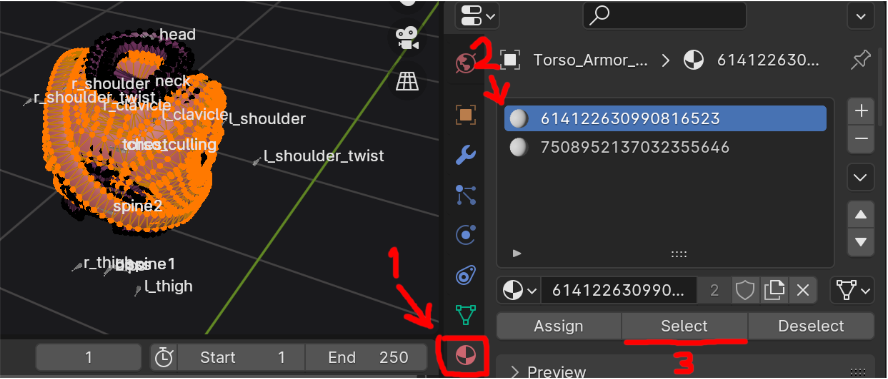
With Armor B highlighted, we can delete it, leaving only Armor A mesh, but with the Avatar rig, Armor B properties, and origin point
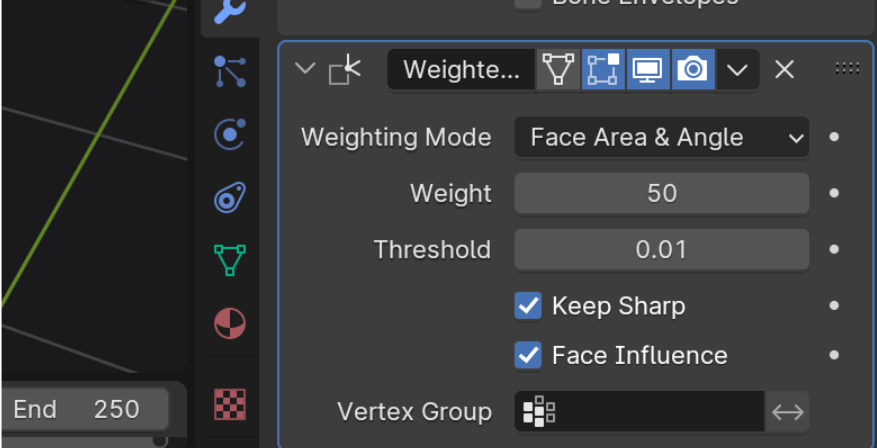
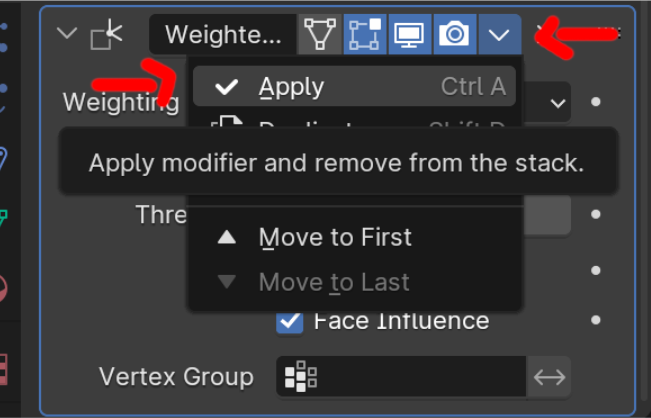
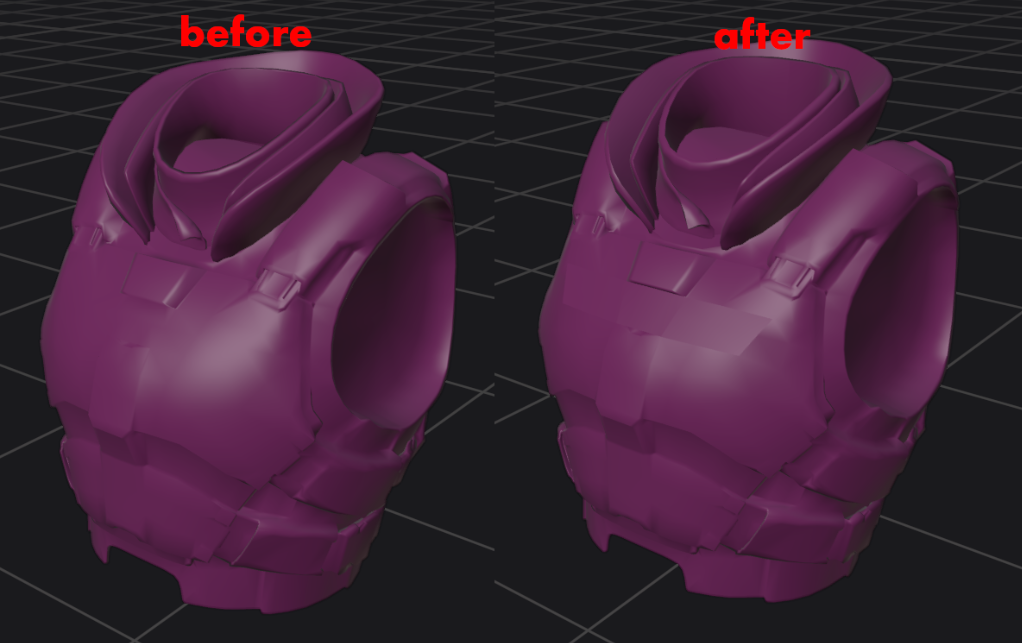
Wighted Normal Modifier (Extra Step)
This really applies to HD2 assets imported via the SDK, but still good to know.
Most (if not all) units imported from the SDK come out looking made of clay/mushed, Armor A is no exception to this
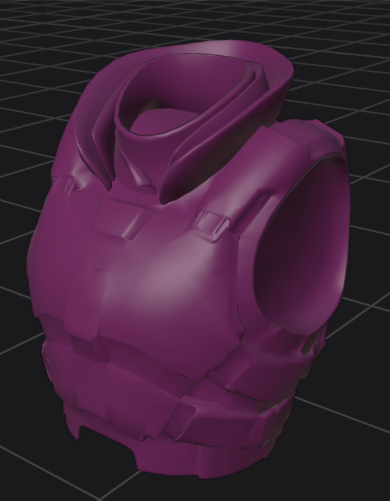
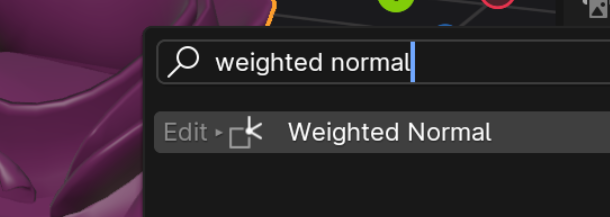
To fix this, we are going to use a modifier called weighted normals
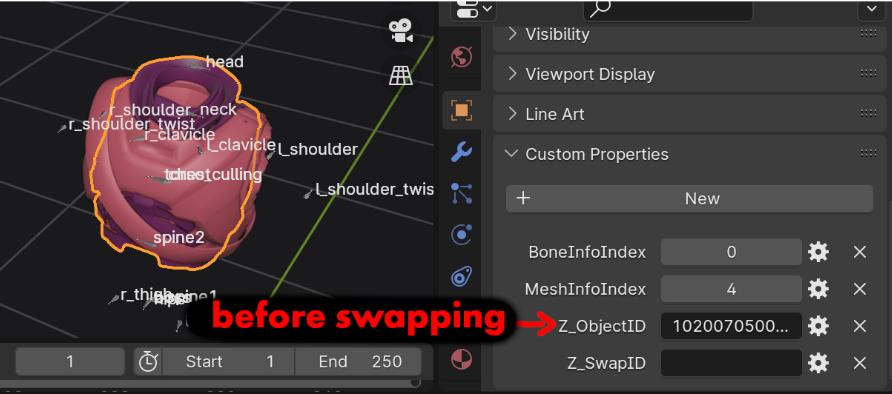
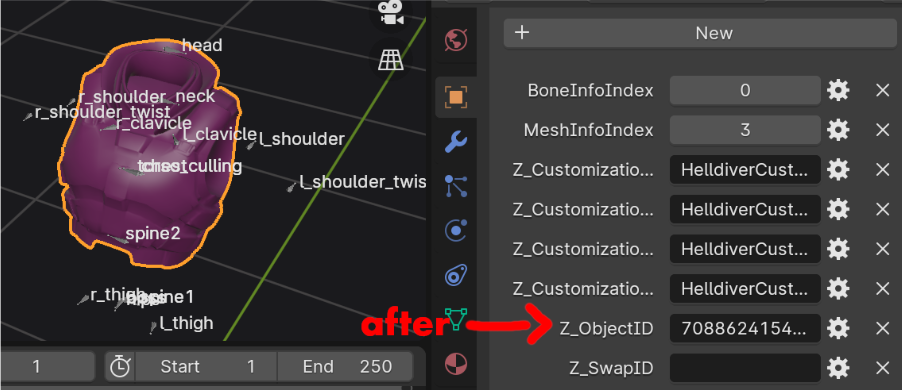
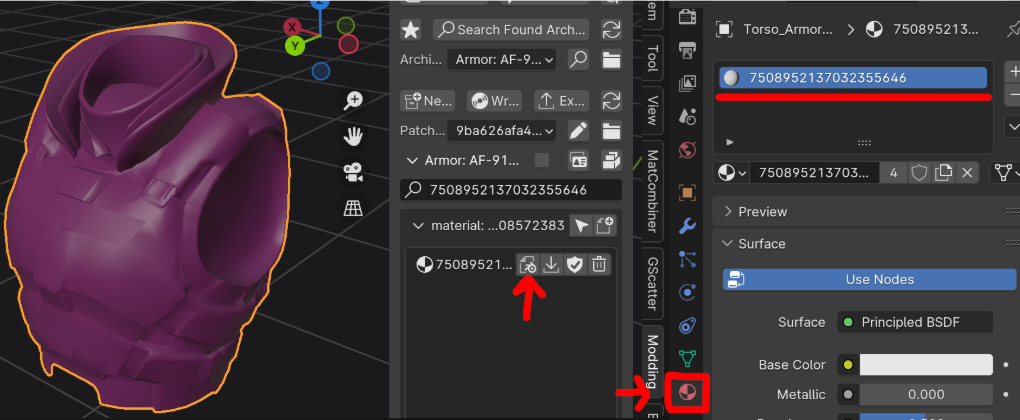
Saving And Patching
With Armor A highlighted, save in Armor B’s ID
Now, if you are using custom materials, those should already be saved in the SDK, and all you need to do is write patch, and check in the game.
If you are using HD2 units, like in this example, you need to save the materials of Armor A so it will show up on Armor B, if you do not, it will not show up at all.
With one unit done, you repeat the process for the rest of the units.